Most people think great interior design requires a huge budget, expensive furniture, or hiring a luxury designer.
My experience has shown the opposite.
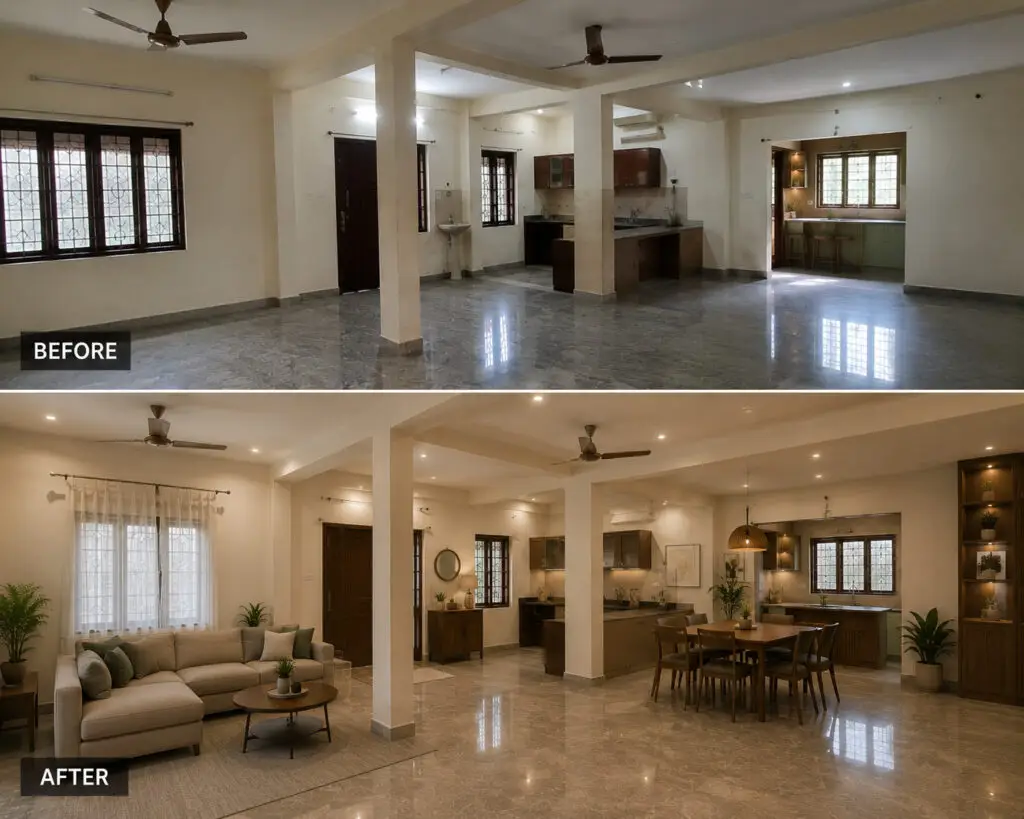
One of my most successful projects involved completely transforming a client’s home for less than $3,000, turning an outdated and cluttered space into a functional, modern, and visually stunning room that looked far more expensive than it actually was.
The biggest difference wasn’t the budget.
It was following a professional design process.
It was following a professional design process.
This post explains exactly how I did it, with real proof, before-and-after photos, and layout templates you can copy.
Why Listen To Me?
Over the years, I’ve worked on residential interior projects involving room planning, furniture layouts, material selection, lighting design, and budget optimization.
My experience includes both technical design education and real-world project execution. I’ve spent years studying interior spaces and working directly with homeowners to solve practical design challenges.
Everything shared in this guide comes directly from actual project work.
No fluff. No theory. No Pinterest-inspired guesses.
These are the same steps I use when designing rooms for real clients.
Before that check some of our other posts
How to Design a Room Like an Interior Designer: A Beginner’s Guide
9 Interior Design Trends I’m Seeing in Real Homes This Year
Step 1: Understand How the Room Will Actually Be Used
Before choosing paint colors or furniture, I always start with one question:
What is this room supposed to do?
Many homeowners skip this step and immediately start shopping.
That’s a mistake.
During my $3,000 transformation project, the room needed to serve multiple purposes:
- Family gathering space
- Entertainment area
- Guest seating
- Everyday relaxation
Understanding these requirements influenced every decision that followed.
Questions I Ask Every Client
- Who uses the room daily?
- How many people use it at once?
- What activities happen here?
- What problems exist right now?
Step 2: Measure Everything Before Designing Anything
This is where professional designers separate themselves from amateurs.
I never purchase furniture before creating an accurate room layout.
For this project, I measured:
- Wall lengths
- Ceiling height
- Window locations
- Door openings
- Electrical points
- Existing furniture
These measurements helped prevent expensive mistakes.
My Recommended Method
- Measure the room.
- Draw a simple floor plan.
- Mark all fixed elements.
- Create furniture zones.
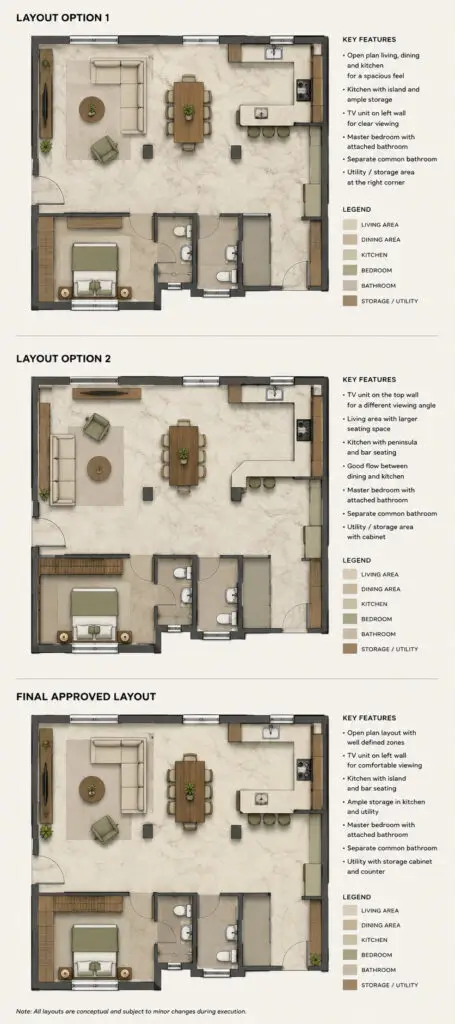
Step 3: Create a Functional Layout First
A room’s layout matters more than its decoration.
I’ve seen expensive rooms fail because the furniture arrangement was poor.
For this project, I created multiple layout options before selecting the final version.
Here’s What Happened When I Tried Arranging the Furniture This Way
My first layout looked great on paper.
Unfortunately, it blocked natural circulation.
People had to walk around furniture to move through the room.
The revised layout:
- Improved movement flow
- Increased seating capacity
- Created a stronger focal point
- Made the room feel larger
This single adjustment dramatically improved the final result.
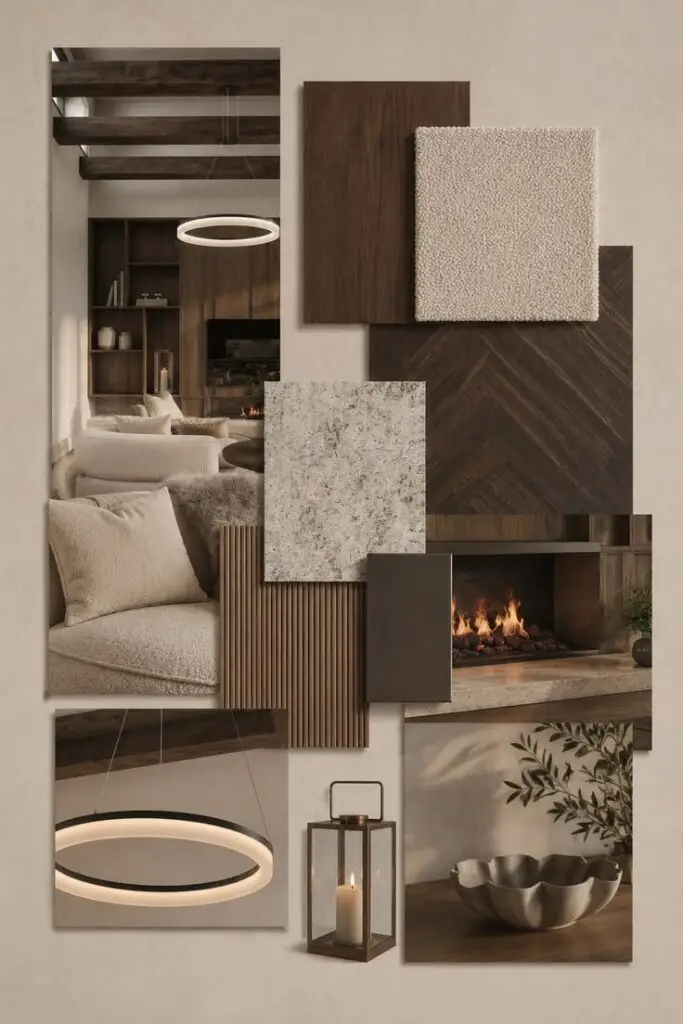
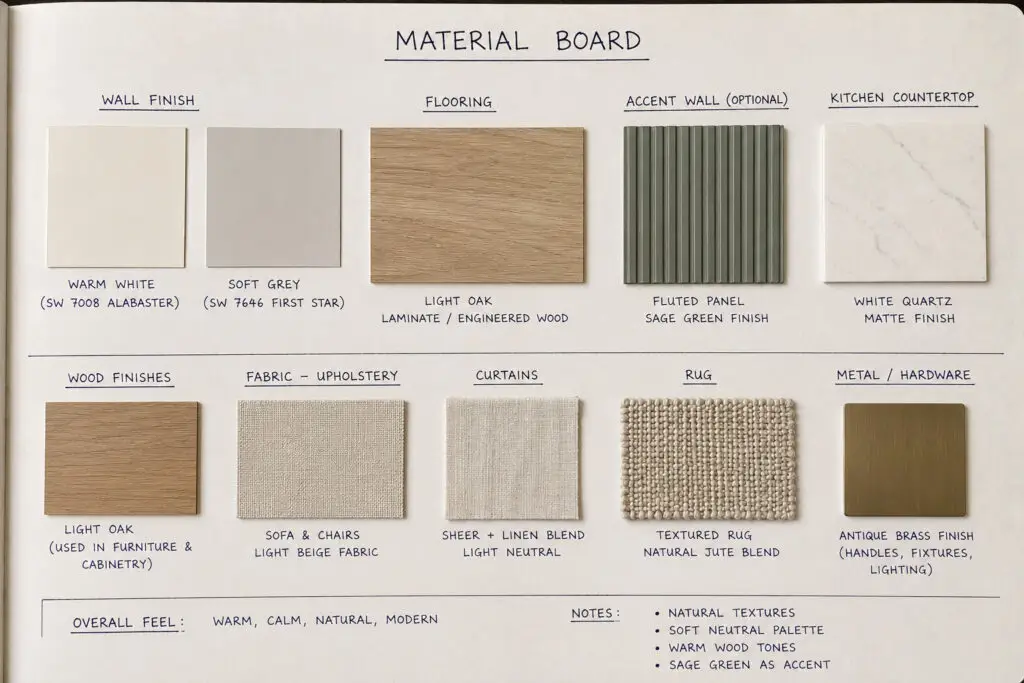
Step 4: Build a Mood Board Before Spending Money
One of the most common mistakes homeowners make is buying pieces individually.
Professionals create a complete visual direction first.
For this project, I created a mood board containing:
- Color palette
- Furniture styles
- Lighting references
- Material samples
- Decor inspiration
This helped ensure every purchase worked together.
My Experience Creating the Mood Board
Initially, the client wanted modern furniture, traditional décor, and industrial lighting.
The styles conflicted.
The mood board revealed these inconsistencies immediately.
By refining the visual direction, we created a much more cohesive design.
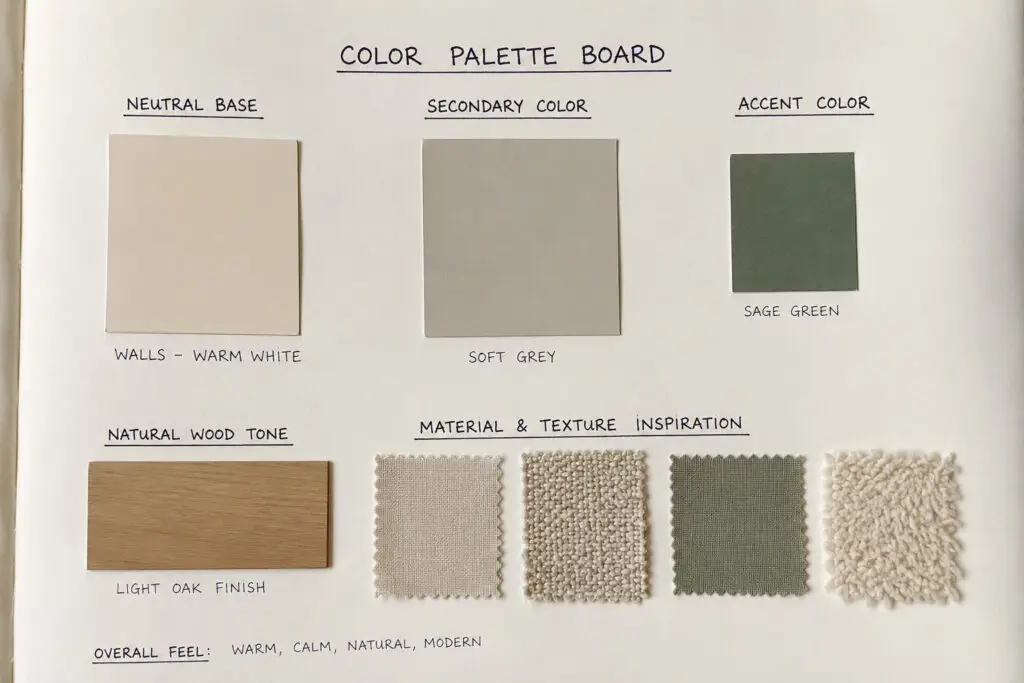
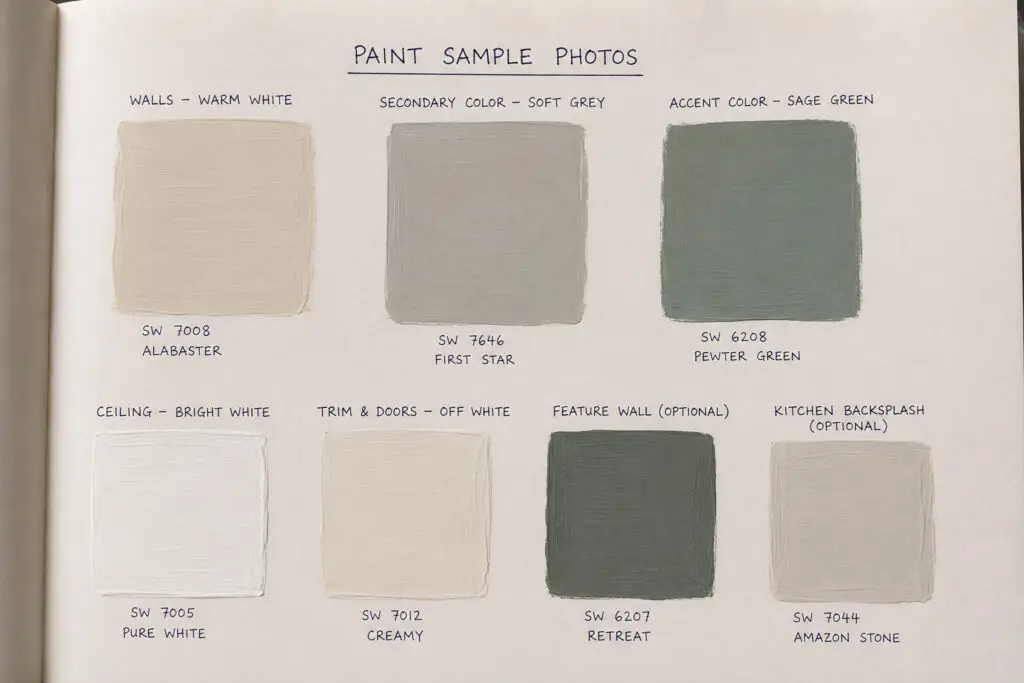
Step 5: Choose the Right Color Palette
Color selection affects how people feel inside a space.
For this project, I selected a neutral foundation supported by carefully chosen accent colors.
My Experience Choosing the Right Color Palette
The client’s original room used several unrelated colors.
The space felt visually chaotic.
I simplified the palette using:
- Primary neutral color
- Secondary support color
- One accent color
- Natural wood tones
The result felt cleaner, larger, and more sophisticated.
9 Home Interior Trends to Follow Before 2026 Ends.
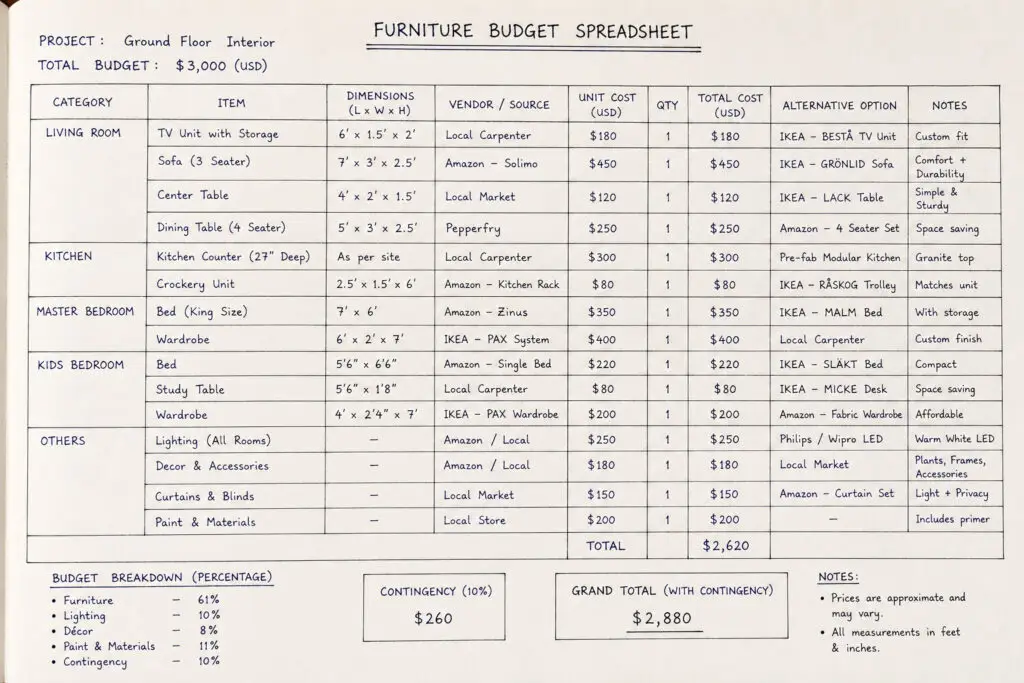
Step 6: Create a Furniture Budget Spreadsheet
Good design is also financial planning.
For the under-$3,000 project, every purchase was tracked carefully.
My spreadsheet included:
- Item name
- Vendor
- Cost
- Delivery charges
- Alternatives
This helped avoid budget overruns.
Sample Budget Categories
| Category | Budget Allocation |
| Furniture | 40% |
| Lighting | 15% |
| Décor | 15% |
| Paint & Materials | 20% |
| Contingency | 10% |
Step 7: Layer Lighting Like a Professional
Lighting is one of the most overlooked aspects of interior design.
Most homeowners rely on a single ceiling fixture.
Professional designers use multiple layers.
For this room, I combined:
Ambient Lighting
General room illumination.
Task Lighting
Focused lighting for reading and activities.
Accent Lighting
Used to highlight design features and create mood.
The difference was dramatic.
The room felt warmer, more luxurious, and significantly more inviting.
Step 8: Add Texture Before Adding More Colors
Many people try to create interest through color.
I prefer using texture.
For this project, texture came from:
- Wood finishes
- Fabrics
- Rugs
- Wall treatments
- Decorative accessories
This added visual depth without overwhelming the room.
Step 9: Style the Room Last
Styling should always be the final stage.
Many homeowners buy decorative items before solving layout and functionality.
I wait until everything else is complete.
Then I add:
- Artwork
- Plants
- Books
- Decorative objects
- Personal accessories
This approach creates a more intentional design.
The Final Result
After completing all nine steps, the room achieved:
- Better functionality
- Improved traffic flow
- Increased storage
- Higher visual appeal
- A cohesive design identity
Most importantly, we stayed within the client’s budget.
Total Project Cost: Under $3,000

Common Mistakes I See Homeowners Make
After years of working on interior projects, these are the mistakes I encounter most often:
- Buying furniture before measuring.
- Choosing paint before selecting furnishings.
- Ignoring lighting.
- Overcrowding rooms.
- Following trends without considering functionality.
- Not establishing a realistic budget.
Avoiding these mistakes alone can dramatically improve your results.
Trustworthiness & Transparency
Affiliate Disclosure
Some links to furniture or decor are affiliate links, but I only recommend items I actually use or sourced for this project.
Privacy & Contact Information
For more information about how this website operates, please review our Privacy Policy, Disclaimer, and Contact pages.
Transparency and trust are important to me, and I want readers to understand exactly how recommendations are made.
Have a Design Question?
Leave your room dimensions, budget, or design challenge in the comments section below.
I’ll personally review as many submissions as possible and provide professional recommendations based on real-world interior design experience.
I’d love to see what you’re working on.
- Budget-Friendly Living Room Decor Ideas for 2026 (Under $200): My Complete Room Makeover Challenge
- How to Design a Room Like an Interior Designer: Step-by-Step
- 9 Interior Design Trends I’m Seeing in Real Homes This Year
- How to Design a Room Like an Interior Designer: A Beginner’s Guide
- 9 Home Interior Trends to Follow Before 2026 Ends.